
Overcoming Challenges for Cameras Shooting dvLED Video Walls

By Aaron Kipfer, CTO
Cameras have a love/hate relationship with direct-view LED screens. Who among us has not experienced the pain of the moire effect, shifting imagery and faded colors as we’re watching something on television or a streaming platform. And to complicate matters further, these challenges are constantly evolving as new cameras and innovations in LED come to the fore in broadcast scenarios. But, when done right, the incredible immersive imagery one can experience when watching a favorite movie, television show, the Olympics, or election results can truly be awe-inspiring.
As a leading dvLED provider to the broadcast market for nearly 20 years, we’ve navigated all kinds of issues and challenges when it comes to capturing LED on camera. With our screens being front and center with clients like ESPN, NBC, FOX, Meet the Press, The Weather Channel and more, we are continually exploring the most efficient and cost-effective ways to manage any challenge that crop up in the essential union of cameras and LED screen.
Though every situation is unique because the blend of cameras and LED screens is different in every scenario, there are some challenges we solve over and over again for camera operators, and we want to dive into those here.
Challenge: Moiré Patterns
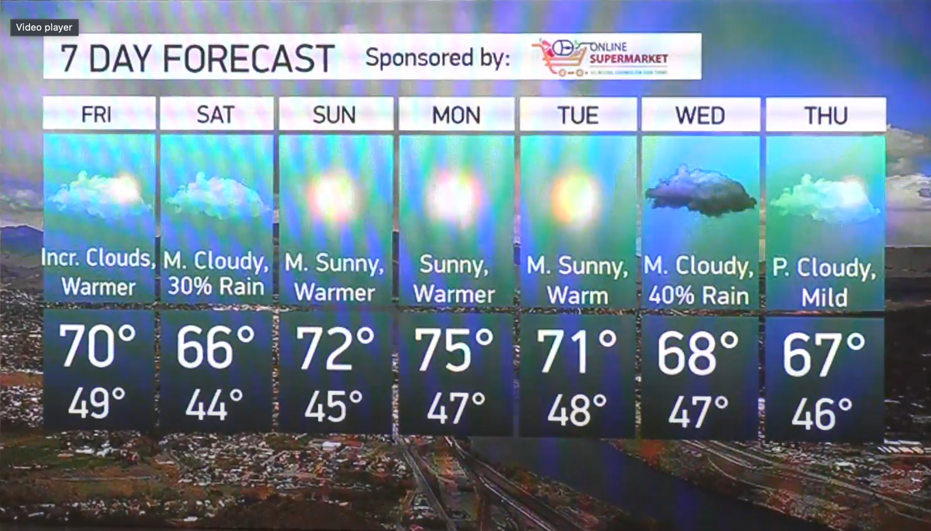
Probably the most common challenge we encounter is an issue with moiré patterns forming on the screen. Moiré occurs when the grid pattern in a camera sensor and an LED wall pattern overlay to create a new, undesired visual effect. The illustration below is a good representation of what moiré can look like to the viewer.
Moiré Effect Solution
Plan ahead by choosing the correct pixel pitch for the focus distance. This measurement has to do with how far the talent will be from the screen. The chart below gives a general guideline as to what the correct focus distance will be. Get a good idea of your environment and room size first, so your LED focus distance will be known and the correct pixel pitch is selected at the outset. Your goal is to keep the camera from focusing on the LED, because when it does, it picks up that grid pattern and, you guessed it, the moiré effect appears.
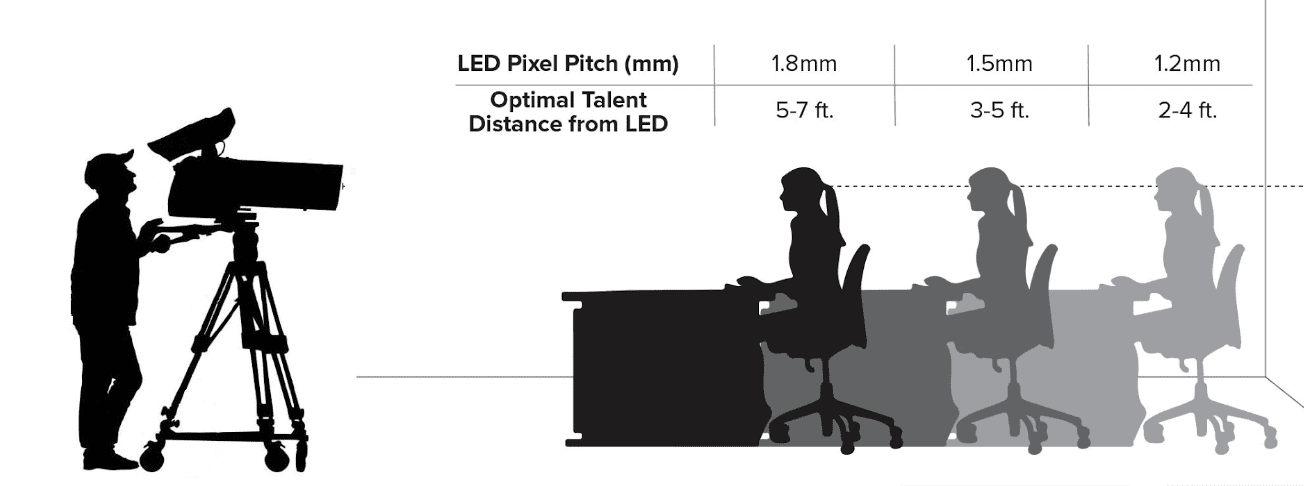
Keep in mind, too, that in a broadcast environment, multiple cameras shooting from different angles all must be tested to ensure they are not focusing on the screen itself and causing moiré patterns to appear.
Step 1 is to simply change the focus. Play with the depth of field and camera angles to reduce the effect. And consider increasing the distance between the primary focal point and the LED.
There are other ways to alleviate moiré patterns by utilizing various filters. Anamorphic lenses, optical low-pass filters and rear projection materials can help to reduce the camera’s focus on LED but can also soften the overall image. These filters will blur the moiré pattern, but also the image behind it. If you are using LED in an application where the detail doesn’t really matter, this could be a solution for you.
Challenge: Scan Lines
Scan lines have become a bigger issue lately because of the changes made to cameras. These may appear as either jagged lines running across the screen, or static horizontal lines, as demonstrated by the images below.

The key to understanding scan lines is understanding refresh rate and scan rate. The refresh rate refers to the amount of time the image is on and off. The scan rate is the number of horizontal or vertical lines that refresh at a time.
Solution: Plan Ahead – Do the Math
Calculate the multiplexing rate to determine if you’ll have an issue with scan lines.
- Formula: (Refresh rate / Scan rate) / Frame Rate = Multiplexing Rate
- Here’s an example: (1920 Hz / 16 scan) / 24 fps + 5 multiplexing rate
The camera is cycling at 24 frames per second, with the LED cycling at 5 frames per second. This means there will be a high likelihood for scan lines because of the gap between the lines. The ideal rate for multiplexing is to have a higher LED rate than your camera.
Genlock Solution
Locking all sources (cameras, switchers, LED controller, etc) to the same timing will alleviate many, but not all scan rate issues. Again, test and test again to see if the results are acceptable for your environment.
Challenge: Color Shift
Color shift occurs when the viewing angles are different and can make the color in one part of the image look different, typically more red. Most commonly, color shift happens when an image is not flat, i.e. wrapped or goes around a corner.
Solution: Choose LEDs with Wide Viewing Options
Know where your camera angles are and think through all of your shot blocking ahead of time. Ideally, you’ll plan time to test the panels ahead of time and see how the color is looking. Ask the manufacturer for a couple panels to test and see what the limitations are. Keep in mind certain colors (like white and light colors) are more susceptible to color shift. Other colors hide it better (like blue and green), so keep this in mind with the set design.
Emerging Issue – Grayscale and Color Accuracy
There are some issues that are becoming a bigger deal for camera operators that I need to mention.
Color and grayscale accuracy are becoming an important issue for studios. At times, the super-saturated colors we’re used to appear different from the natural tone intended. For example, in in situations like skin tones, or where exact branding colors are required, color accuracy becomes very critical to the user experience.
Trying to manually adjust for color accuracy may work in some instances. However, when you are able to match LED to a very specific color profile, you’re working with a much better set of tools. The control system itself, as well as the components, will determine how accurately the color will be displayed. Make sure the product you are using is the right one for your specific application. It’s important to know exactly what you’re getting.
Closing Thoughts
I hit on a handful of the most common challenges with camera operators and LED. To overcome all these challenges, it’s important to know exactly what you’re investing in and to do your homework up front.
Whenever possible, we recommend testing the panels you’re considering with all the cameras and angles you’ll be using in your studio environment. There are many variations of LED panels available, so be sure you know what you’re getting and what the user experience will be.


